First Project: Deploy Node.js Application
This article uses a simple Node.js HTTP service as an example to demonstrate how to deploy and manage projects through AcePanel.
Prepare Code
First, prepare a simple Node.js application. Create app.js in the project directory:
const http = require('http');

const server = http.createServer((req, res) => {
    res.writeHead(200, {'Content-Type': 'text/plain'});
    res.end('Hello from AcePanel!\n');
});

server.listen(3000, () => {
    console.log('Server running at http://localhost:3000/');
});
Create Project
Go to the "Projects" page, switch to the "Node.js" tab, and click "Create Project".
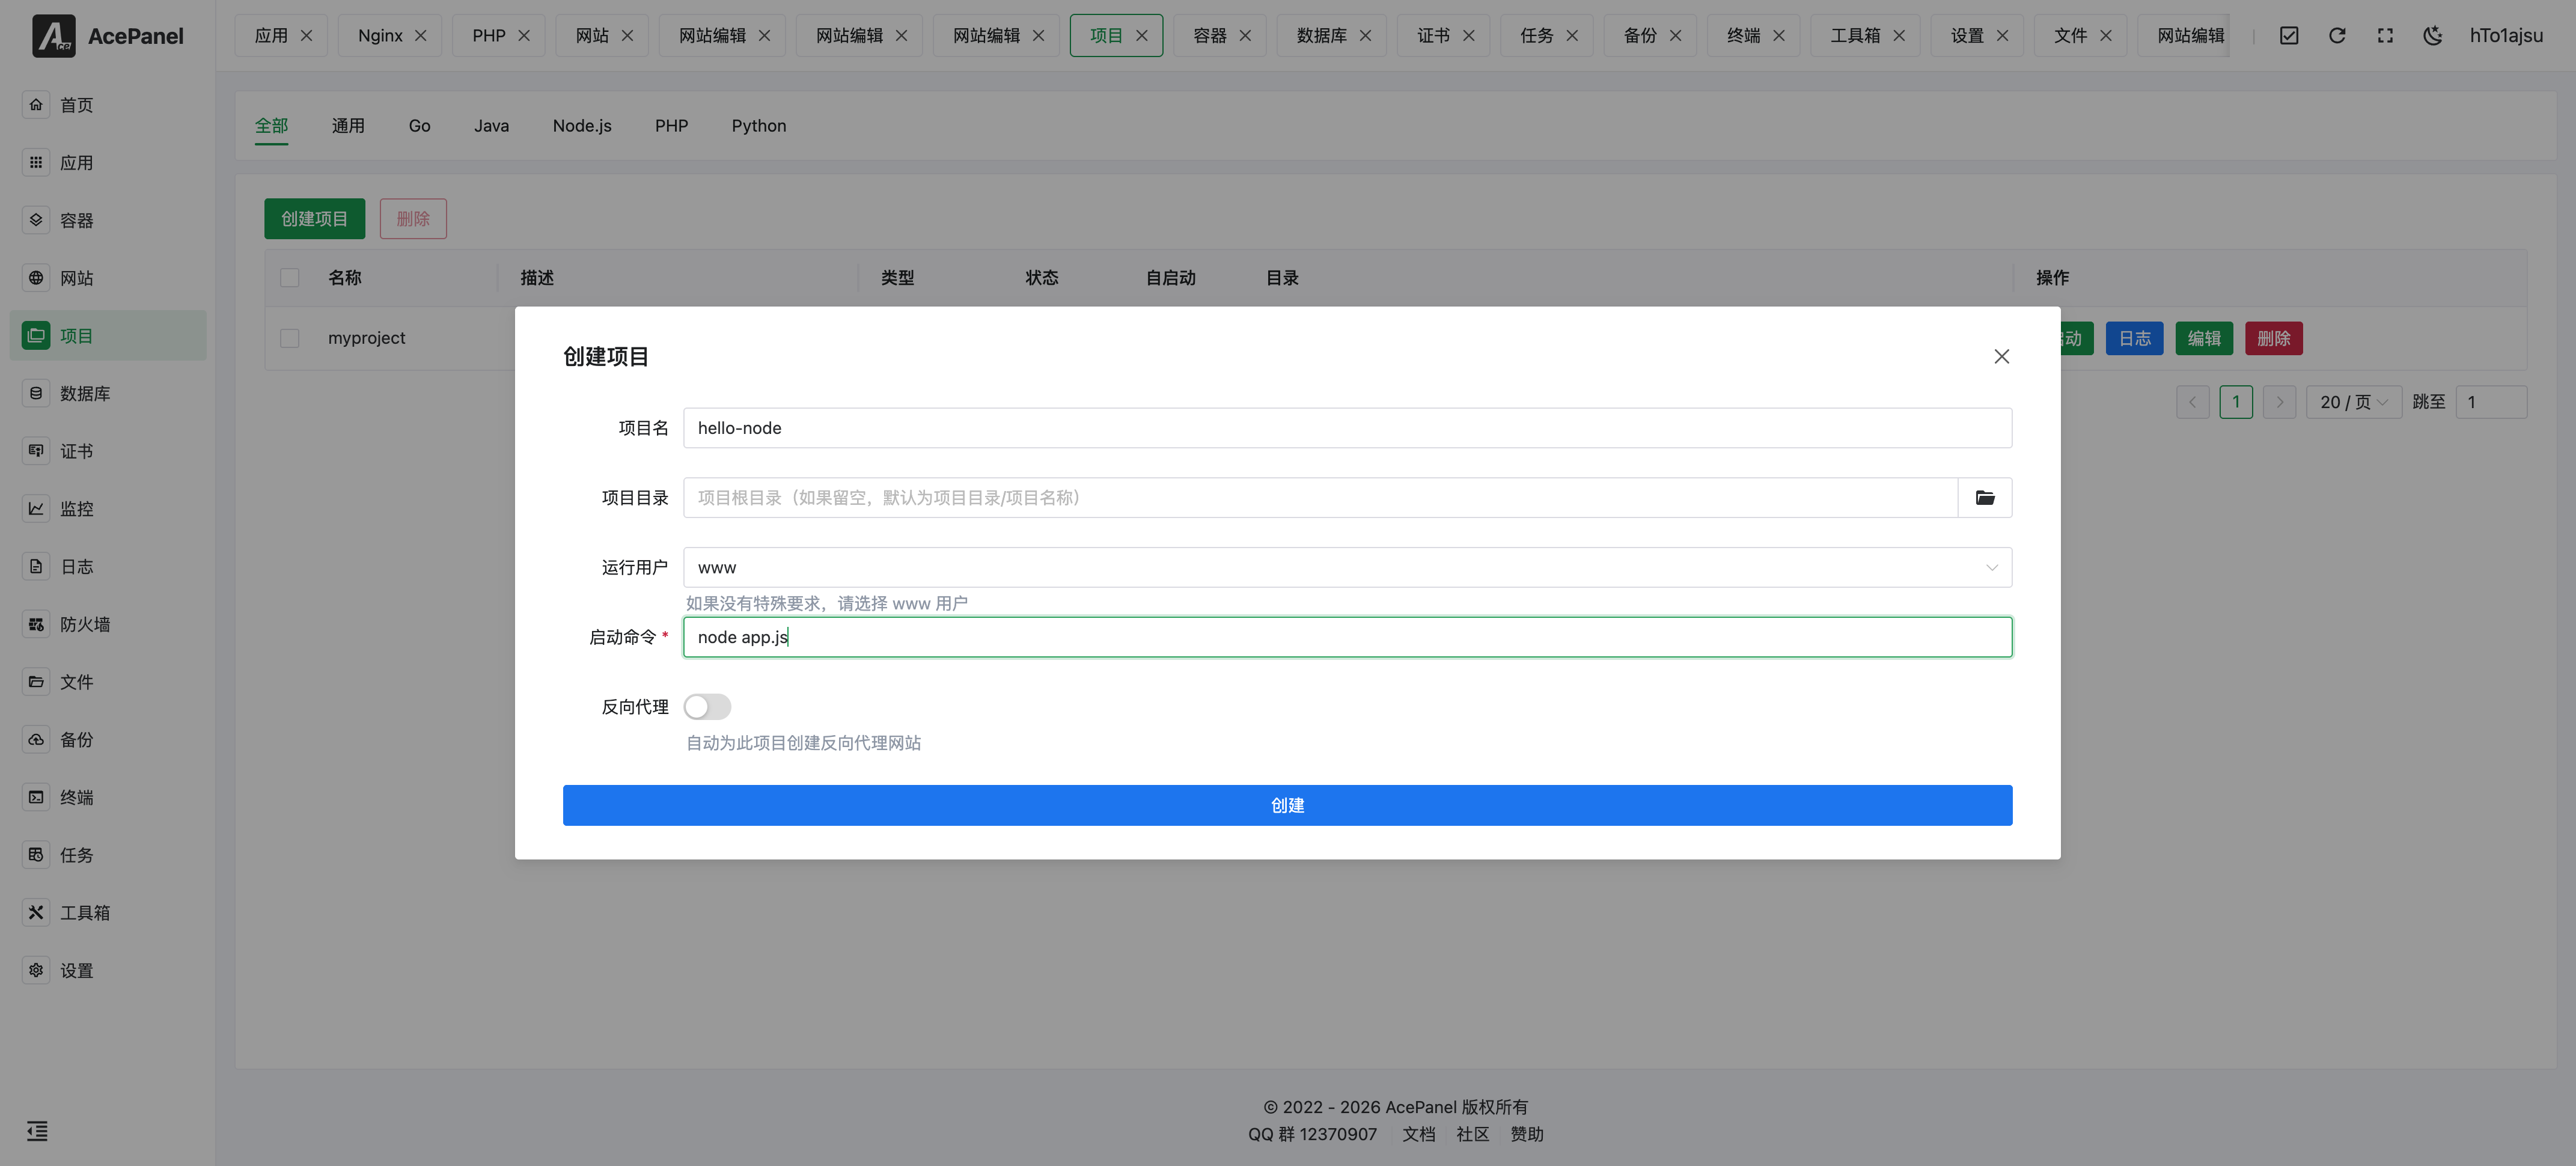
Fill in the configuration:
- Project Name: Project identifier, e.g.,
hello-node - Project Directory: Leave empty to use default path (
project directory/project name) - Node.js Version / Framework: Pick an installed Node.js version and a framework preset (Express, Koa, Fastify, NestJS, Next.js, Nuxt.js, Hapi, AdonisJS). The start command is generated automatically; choose "Custom" to fill it in yourself
- Run User: Usually select
www - Start Command:
node app.js - Reverse Proxy: Enable auto-create reverse proxy if you need to access via domain. When enabled, also fill in the Domain and the Project Port your app listens on (e.g.,
3000), and a proxy website tohttp://127.0.0.1:<port>is created automatically
Other Project Types
This article uses Node.js as an example, but the "Projects" page also has tabs for General, Go, Java, PHP, Python, and .NET. Switch to the matching tab before clicking "Create Project". Each language type lets you pick an installed runtime version and a framework preset that auto-generates the start command (choose "Custom" to write it yourself):
| Type | Version + Preset Options |
|---|---|
| General | No version/framework selectors; just fill in the start command manually (for any process not tied to a managed runtime) |
| Go | Run Mode of Source Code (pick a Go version and an Entry File such as main.go, runs go run) or Binary (runs the compiled binary in the project directory) |
| Java | Java version + Spring Boot (JAR/WAR), Quarkus, Micronaut, Vert.x, Dropwizard |
| PHP | PHP version + Laravel Octane, Laravel (Artisan Serve), ThinkPHP, Webman, Hyperf, Swoole HTTP, RoadRunner |
| Python | Python version + Django, Flask, FastAPI (Uvicorn), Tornado, Sanic, aiohttp, Gunicorn |
| .NET | .NET version + ASP.NET Core Web, ASP.NET Core API, Blazor Server, gRPC Service, Worker Service |
TIP
Version selectors only list runtimes already installed via the "Environment" page. Install the language version you need first if the dropdown is empty.
Upload Code
After the project is created, go to the "Files" page, navigate to the project directory (e.g., /opt/ace/projects/hello-node), and upload the app.js file.
You can also use git clone in the terminal to pull the code.
Configure Project
Click "Edit" in the project list to adjust more settings. The editor has five tabs: Basic Settings, Runtime Settings, Dependencies, Resource Limits, and Security Settings.
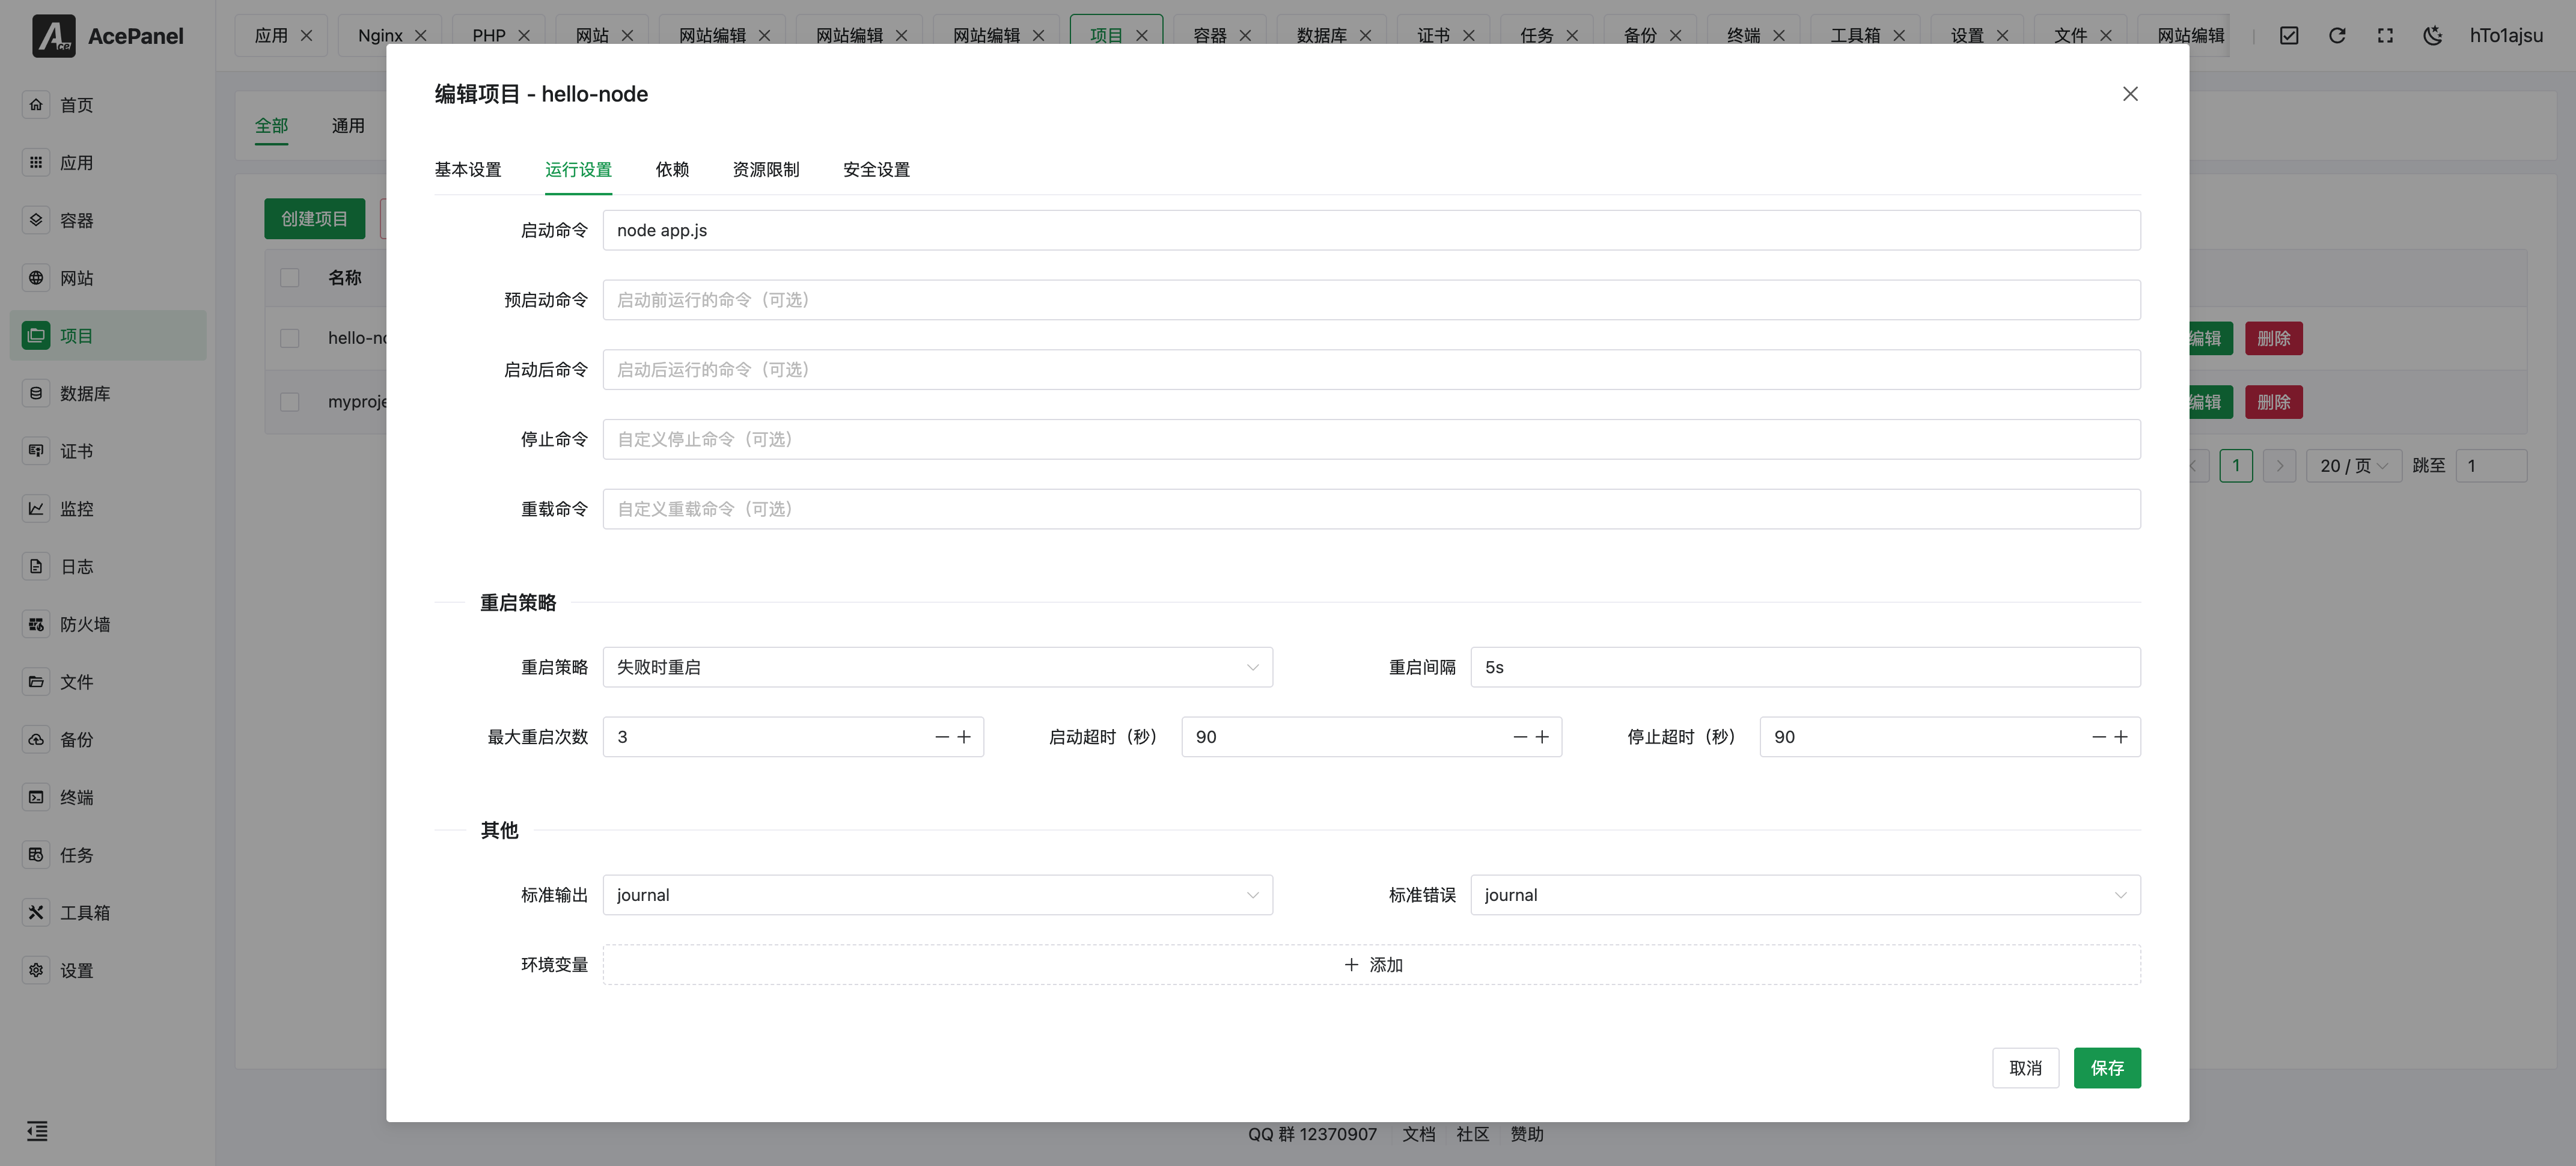
Runtime Settings:
- Pre-start Command: Execute before starting, e.g.,
npm install - Restart Strategy: How to handle process exits (No restart / Always / On failure / On abnormal / On abort / On success), plus restart interval, max restarts, and start/stop timeouts
- Standard Output / Standard Error: Where logs go (journal, syslog, file, etc.)
- Environment Variables: Set
NODE_ENV=production, etc.
Dependencies: Configure systemd service dependencies (Requires / Wants / After / Before) to control startup order, e.g., network.target or mysqld.service.
Resource Limits: Cap how much of the host the service may use.
- Memory Limit (MB): Maximum memory; set to
0to disable the limit - CPU Quota: CPU time the service may use, expressed as a percentage where
100%equals one full CPU core (e.g.,50%for half a core,200%for two cores). Leave empty for no limit
Security Settings: Apply systemd sandboxing to isolate the service. These can affect functionality, so test thoroughly before relying on them in production.
- No New Privileges: Prevent the process and its children from gaining new privileges (e.g., via setuid binaries)
- Protect /tmp: Give the service a private
/tmpisolated from other processes - Protect /home: Hide
/home,/root, and/run/userfrom the service - Protect System: Mount system directories read-only —
truemakes/usrand/bootread-only,fulladditionally protects/etc, andstrictmakes the entire filesystem read-only (except explicitly allowed paths) - Read-Write Paths: Paths the service is allowed to write to even when Protect System is enabled
- Read-Only Paths: Paths the service may read but not modify
Start Project
Return to the project list, click the "Start" button.
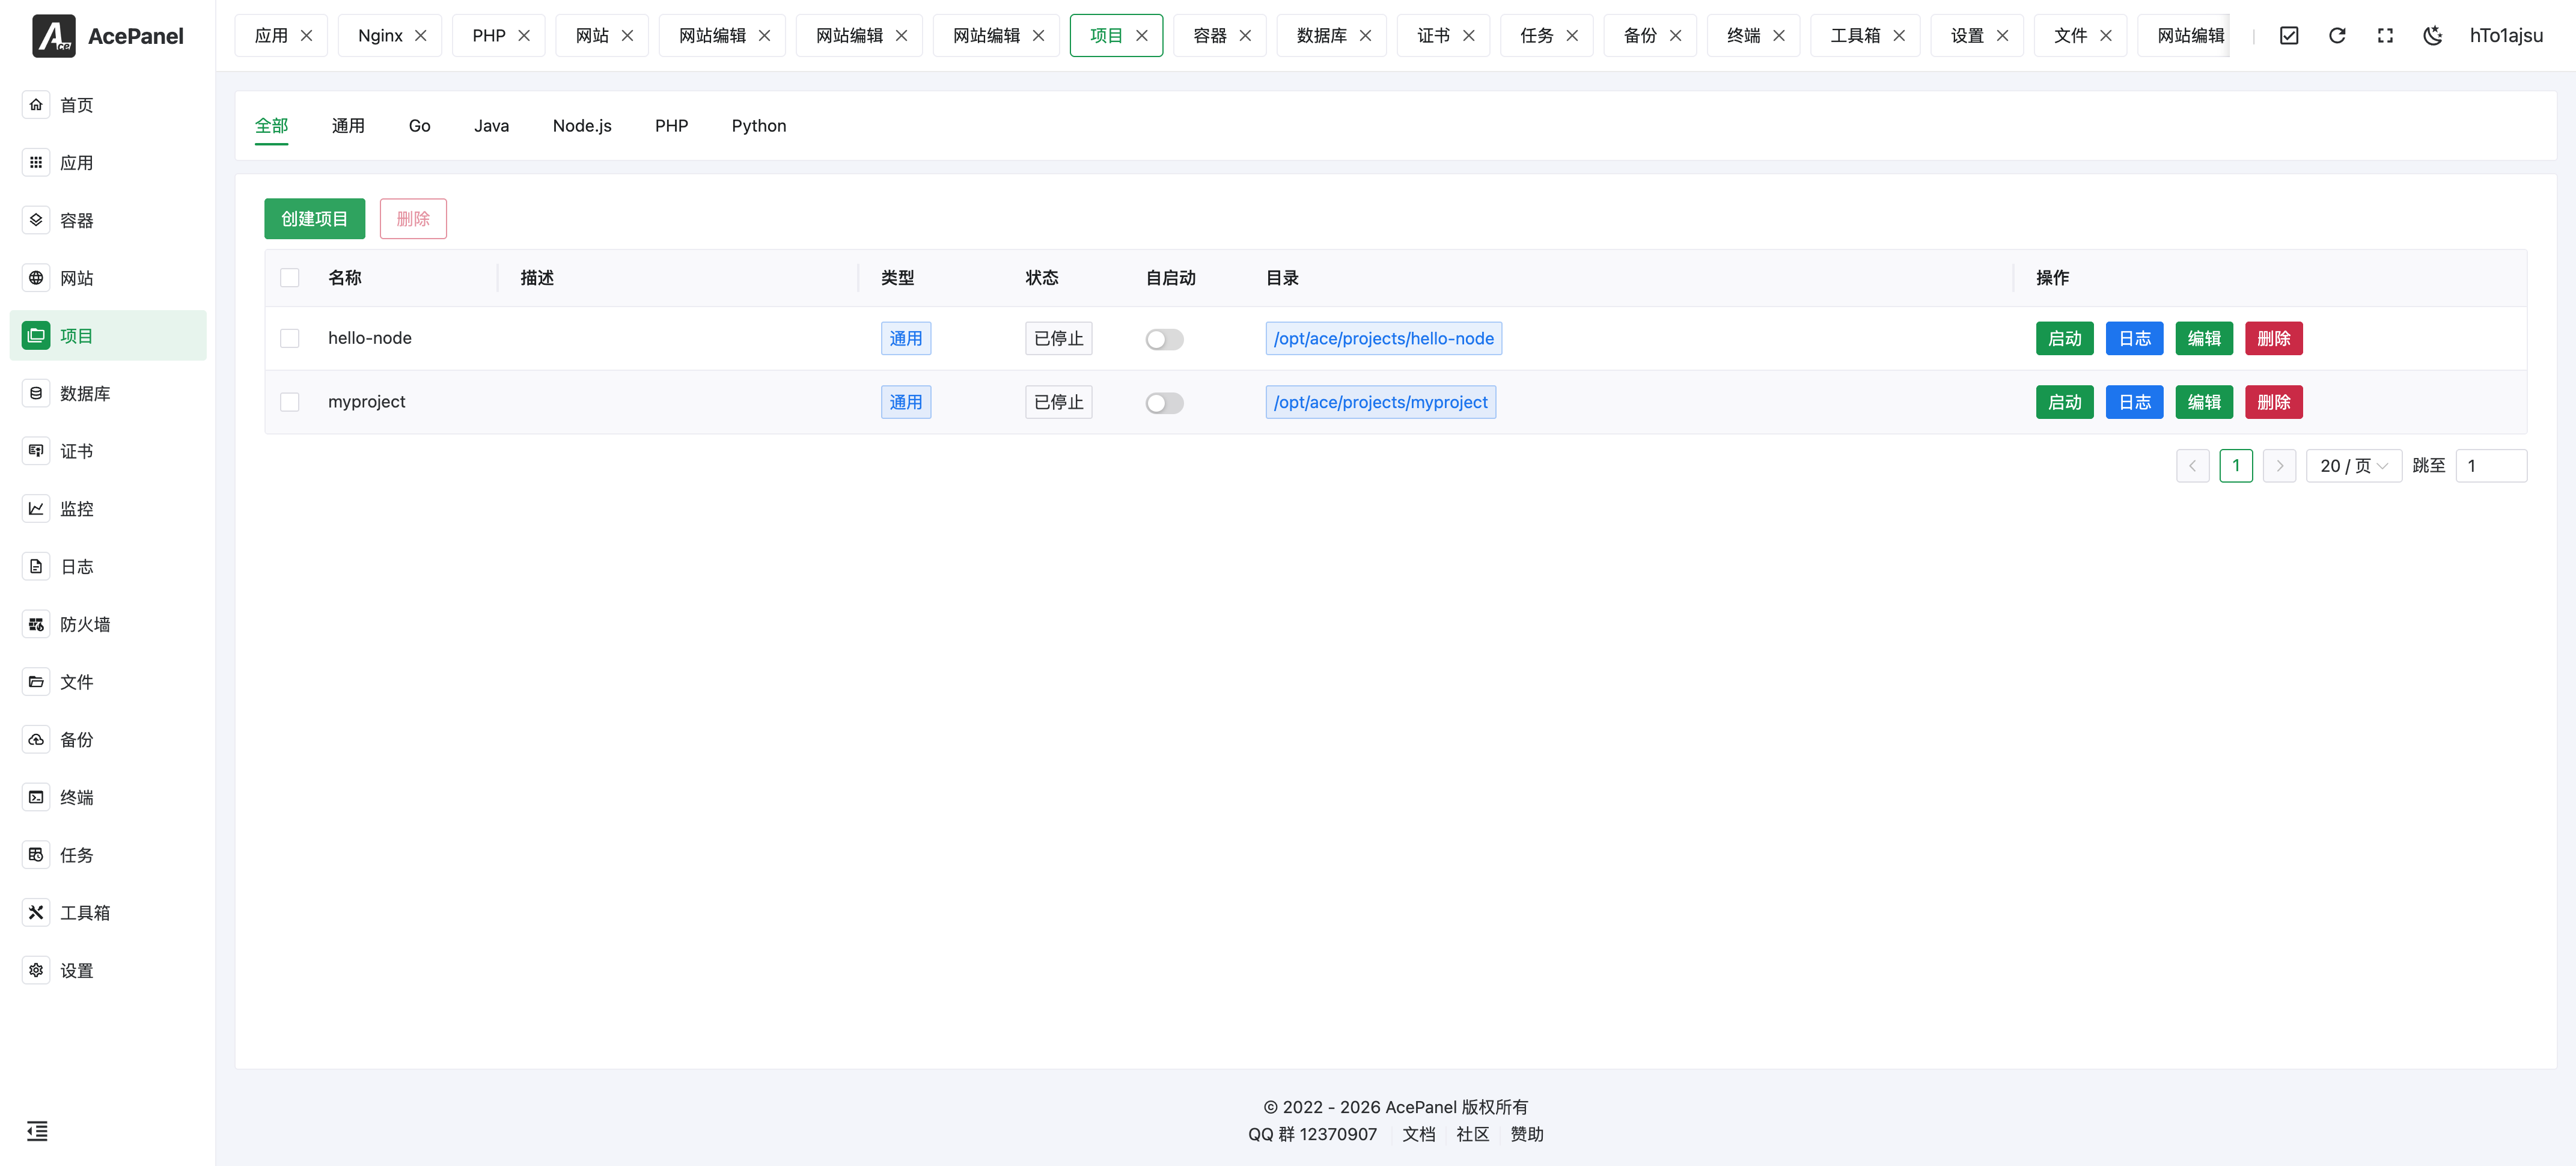
After starting, "Restart" and "Reload" buttons appear for the running project. Click "Logs" to view output and confirm the service is running normally.
Access Service
If reverse proxy is enabled, access via the configured domain.
If not, you can access directly via http://ServerIP:3000 (need to allow port 3000 in the firewall).
Production Environment
Production environment recommendations:
- Toggle the "Autostart" switch in the project list to automatically recover after server restart
- Configure reverse proxy to forward requests through Nginx
- Set memory limits in the "Resource Limits" tab to prevent memory leaks