First Website: Deploy WordPress
This article uses WordPress as an example to demonstrate how to quickly set up a PHP website through AcePanel.
Install Environment
Go to the "Apps" page:
- Install Nginx and Percona (or MySQL/MariaDB) in "Native App"
- Install PHP (8.3+ recommended) in "Operating Environment"
Installation progress can be viewed on the "Task" page under the "Panel Tasks" tab.
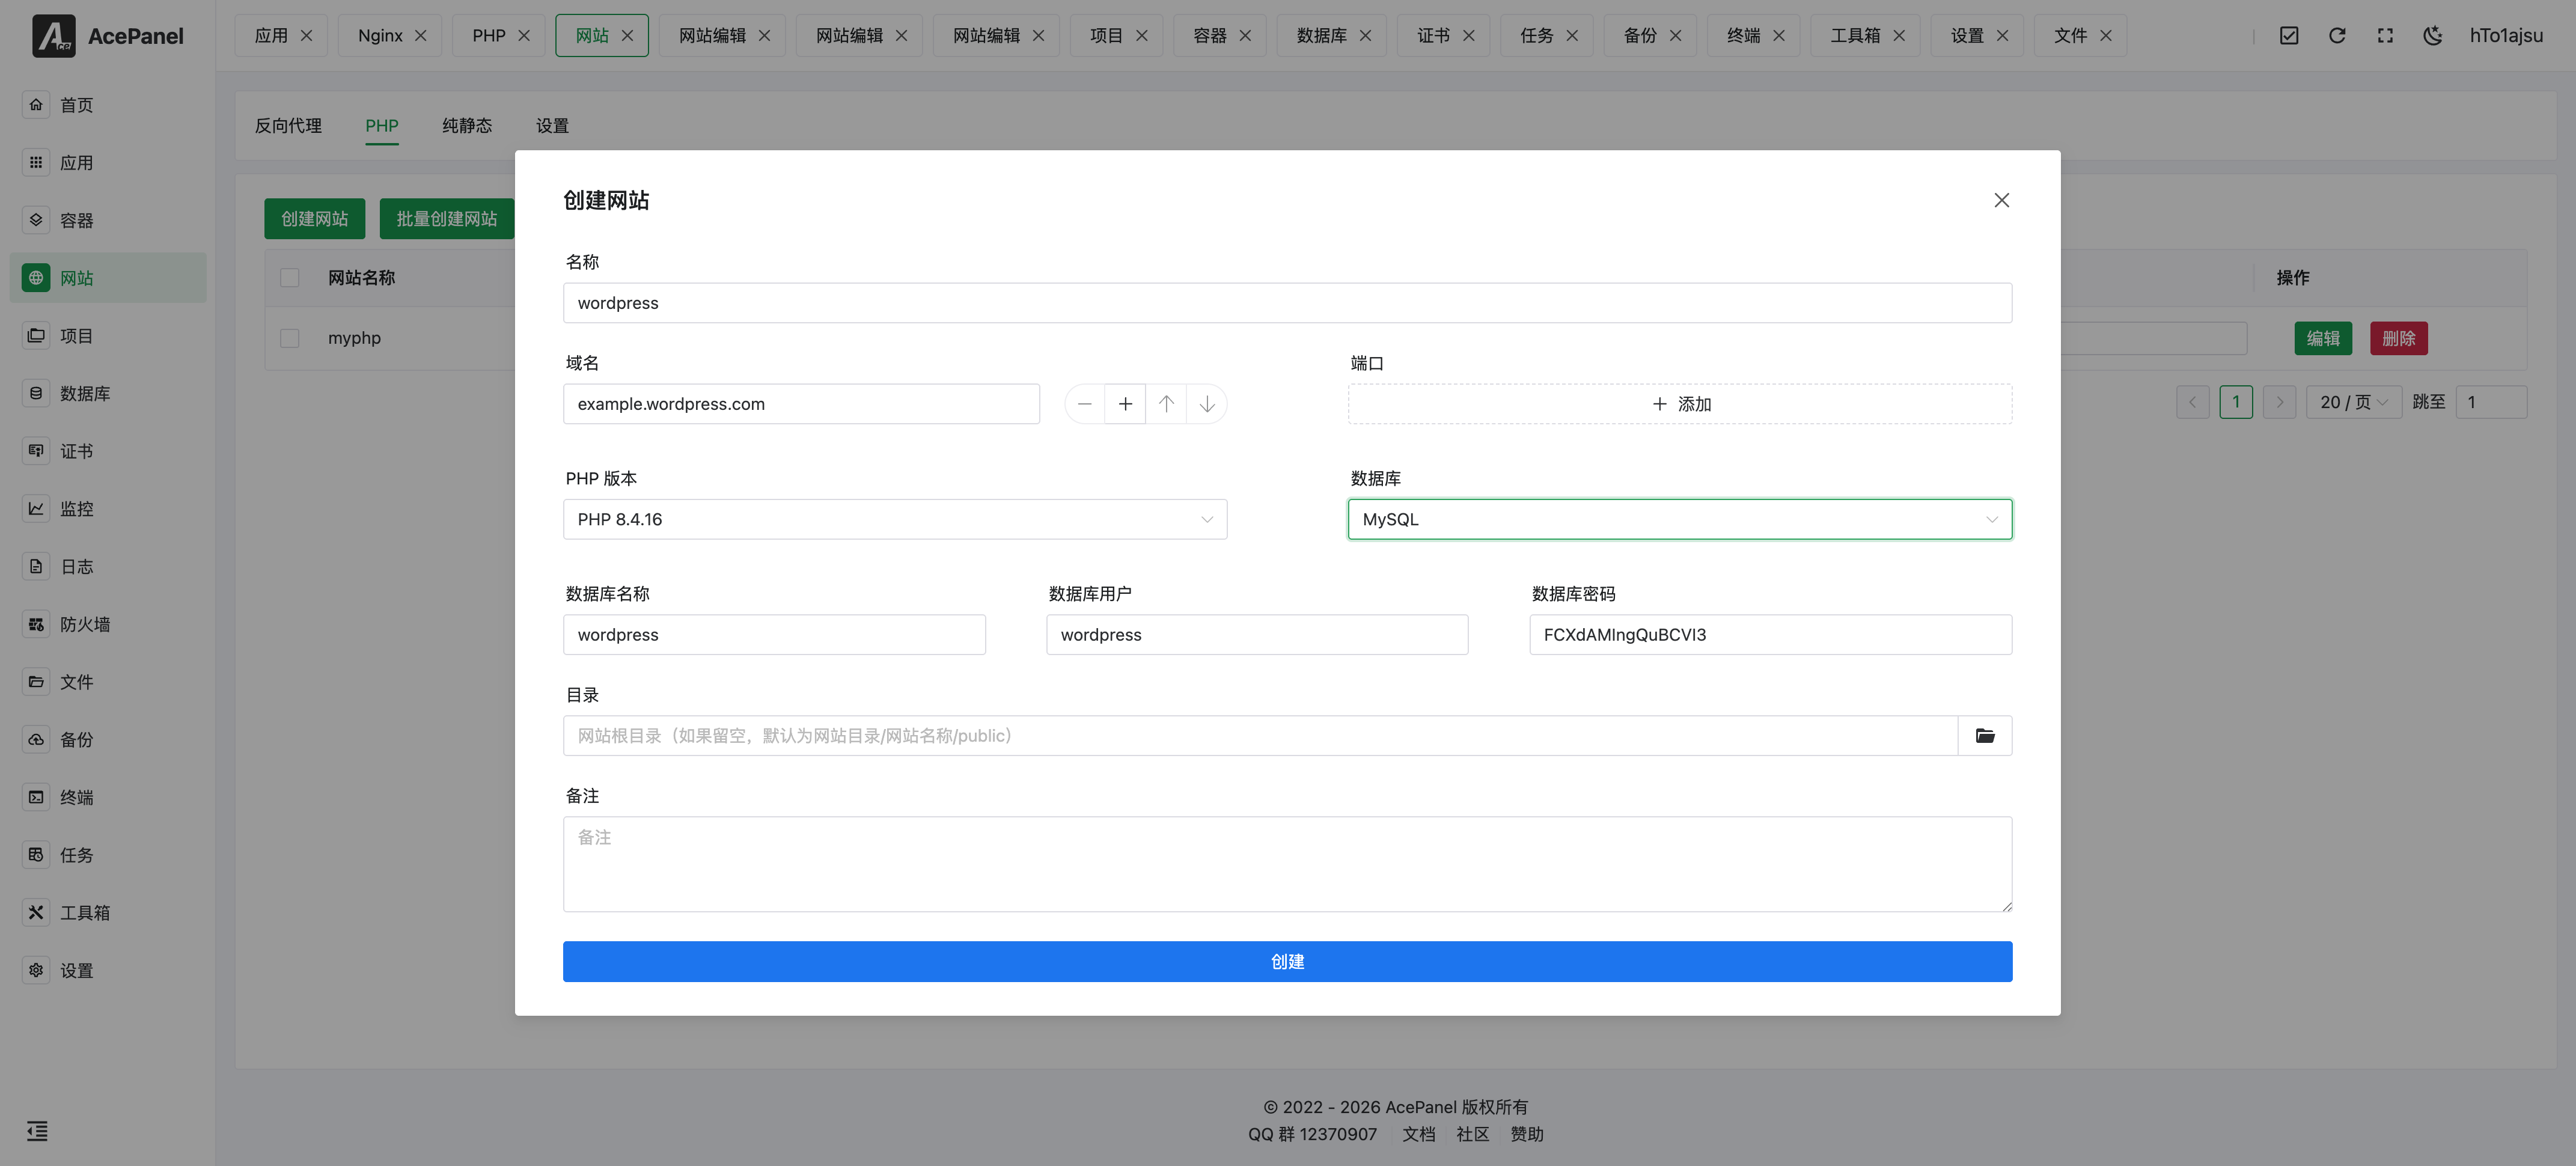
Create Website
Go to "Website" -> "PHP", click "Create Website".
Website Type
Entering from the "PHP" tab as above pre-selects the PHP type and hides the type selector. If you instead start from the top-level "All" tab, the form shows an extra Website Type selector with three options: Reverse Proxy, PHP, and Pure Static. Choose PHP there to get the same fields described below.
Fill in the configuration:
- Name: Website identifier, e.g.,
wordpress, only supports letters, numbers, hyphens, and underscores, and cannot be changed after creation - Domain: Your domain name, use server IP if you don't have a domain
- Port: Defaults to
80 - PHP Version: Select the version you just installed
- Database: Select MySQL, note down the auto-generated database name, username, and password
- Directory: Website root directory, leave empty to default to
website directory/website name/public
Upload WordPress
Download the installation package from the WordPress official website.
Click the path in the "Directory" column of the website list to enter file management, upload the compressed package and extract it. Enter the wordpress directory, Ctrl+A to select all, Ctrl+X to cut, return to the parent directory and Ctrl+V to paste, moving the files to the website root directory.
Configure Rewrite Rules
Return to the website list, click "Edit", switch to the "Rewrite" tab, select the preset wordpress rule and save.
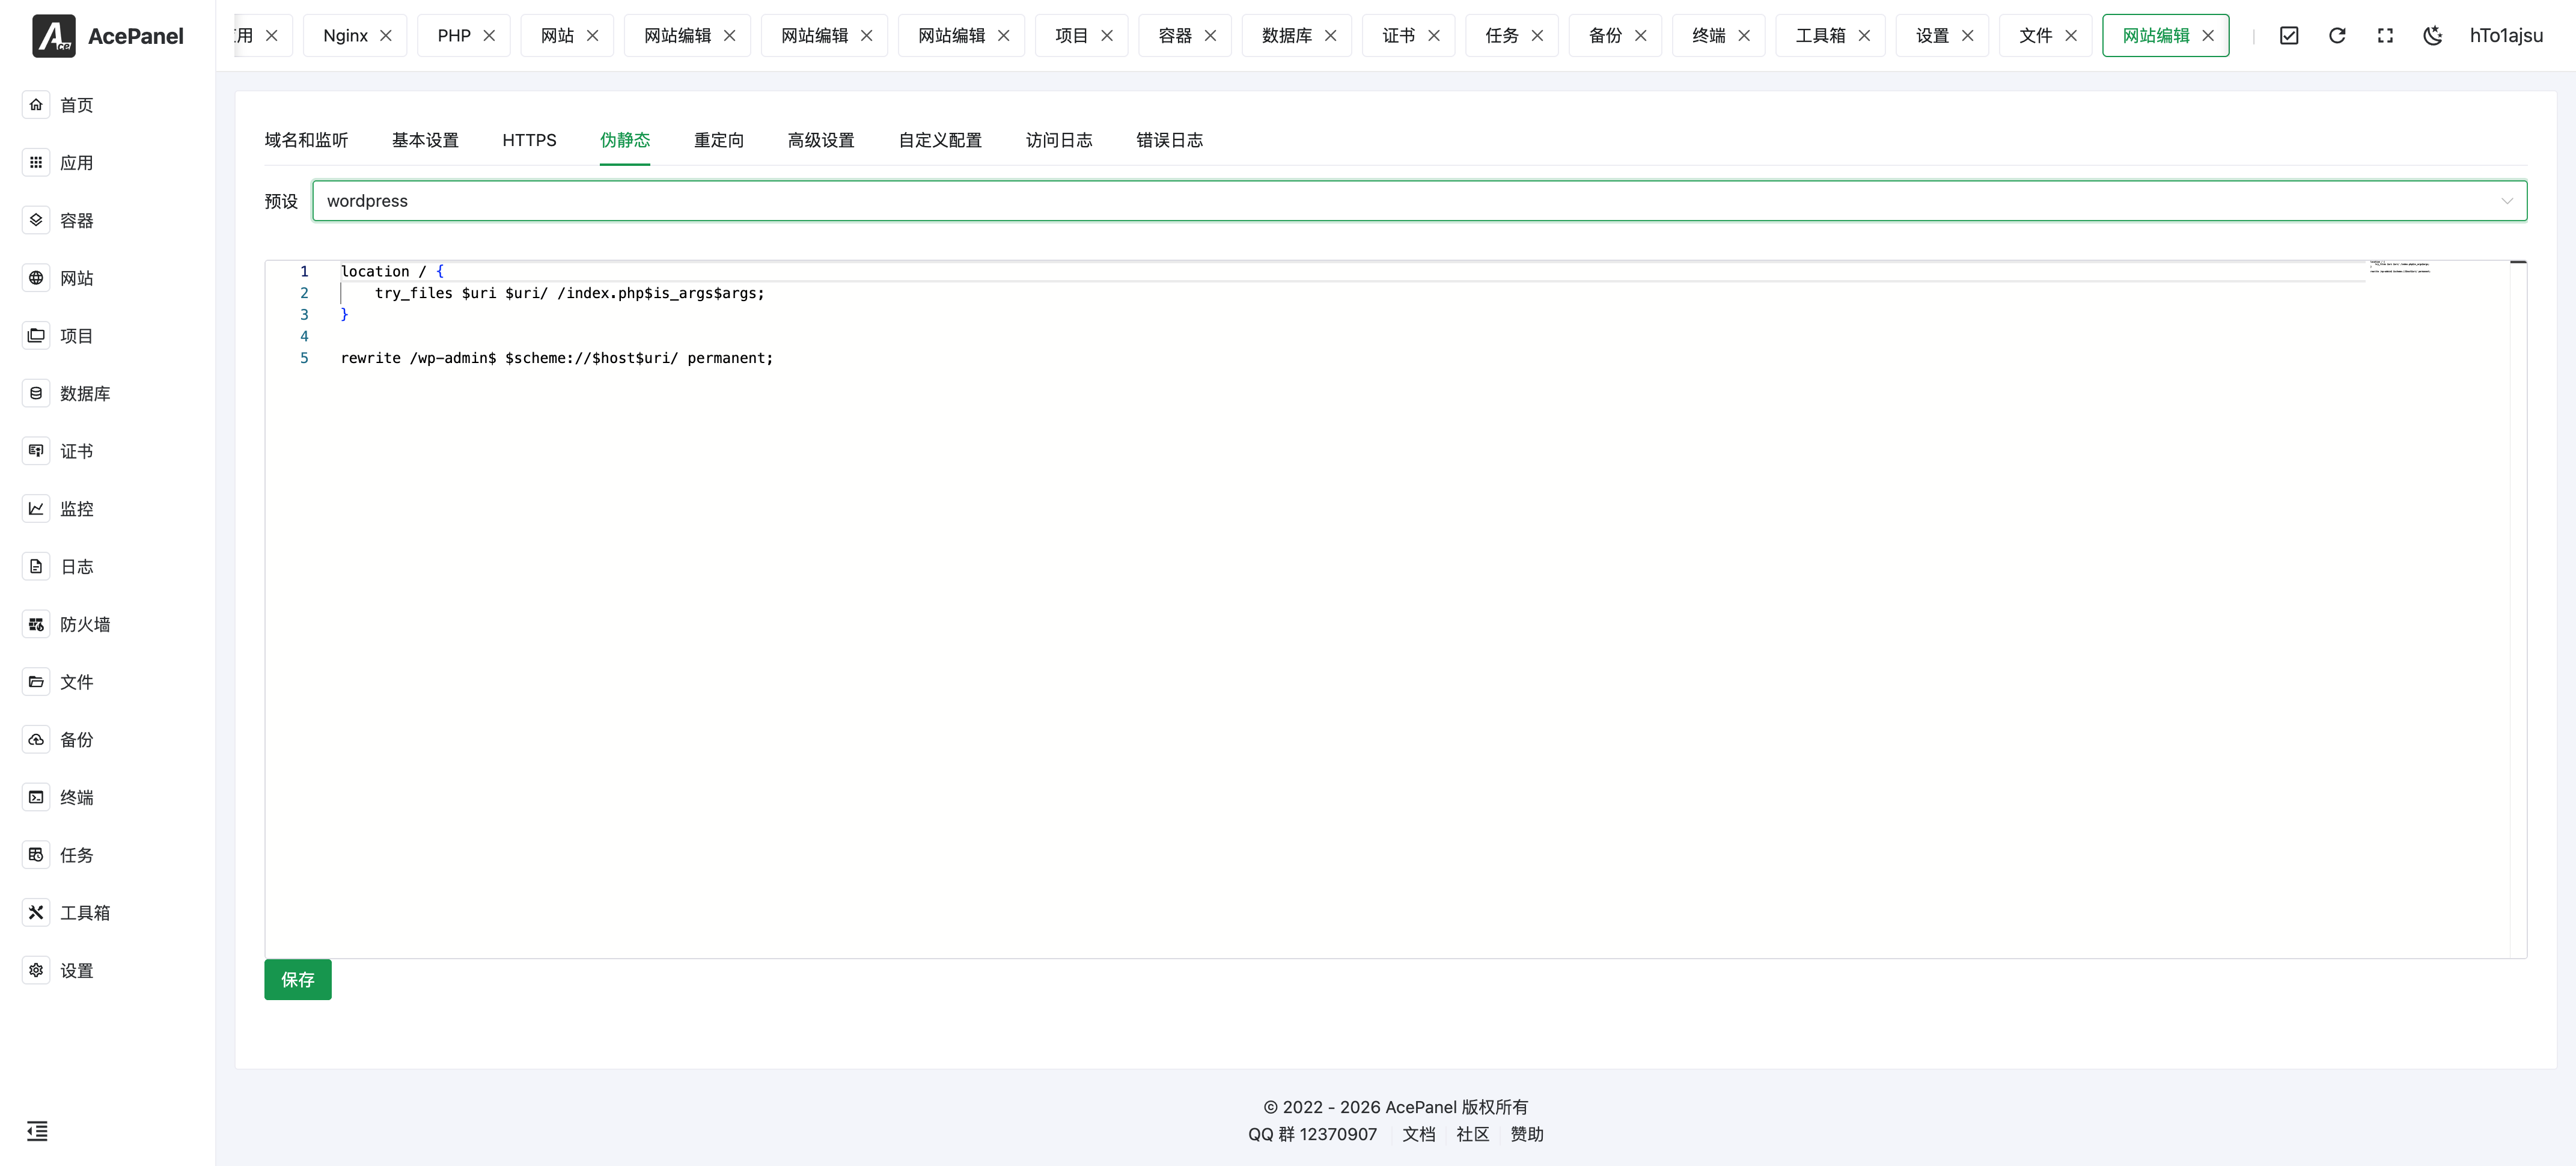
WordPress Multisite
If you are running a WordPress multisite network instead of a single site, select the wordpress-multisite preset from the same dropdown.
HTTPS
You can issue a free Let's Encrypt certificate with one click in the "HTTPS" tab.
Install WordPress
Access your domain in the browser and follow the prompts to complete the installation:
- Select language
- Fill in site information (title, admin account, etc.)
- Database configuration: Enter the database information noted earlier, host is
localhost
After installation, you can log in to the WordPress admin panel.